The popularity of podcasts is on the rise, and the availability of online tools has made it easier for people to create high-quality podcasts on their
The popularity of podcasts is on the rise, and the availability of online tools has made it easier for people to create high-quality podcasts on their own. As a result, there has been a surge in DIY recording and distribution. However, having the appropriate equipment and podcast studio is crucial for producing a top-notch podcast.
These days, many podcasts are recording their sessions to reach a larger audience on social media platforms like YouTube and TikTok. This is why having an appealing set-up is important too.
Why Is It Necessary To Have A Quality Podcast Recording Studio?
The success of your show largely depends on a quality performance. If your audio production is poor, you’re less likely to attract an audience who values their time. A lackluster studio setup can lead to substandard audio output.
You might think that you need expensive podcast recording equipment for a top-notch studio that looks great on Instagram. But the truth is, you don’t have to go broke setting up your podcast studio. You can make one at home using our easy and affordable ideas, tips and tricks.
While having a well-stocked podcast studio is important, don’t put off starting your show until everything’s perfect. It’s better to start recording episodes as soon as possible. The sooner you gain experience in creating compelling content, the quicker you’ll grow your listening audience.
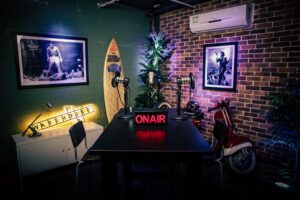
How To Setup A Podcast Studio – Things You Need
Although many podcast room ideas are available, constructing a podcast studio requires specific elements.
A dedicated roomFor recording your podcast, it is recommended to have a designated area or a recording studio that is properly insulated for sound and acoustically treated. |
Podcasting equipmentIt is essential to have a minimum of one good microphone and a set of headphones for every individual involved. Additionally, improving the recording’s audio quality may necessitate purchasing a mixer, compressor, and other audio gear. |
Digital audio workstationYou will need a digital audio workstation (DAW) software for recording and editing. Adobe Audition, Audacity, and Pro Tools are among the popular choices available. |
Furniture, lighting & other décorsComfortable seating and a sturdy table are essential to hold the necessary equipment. Additionally, incorporating a couch or other seating for guests is recommended. Secondly, proper lighting is crucial for recording a video podcast and setting a welcoming ambiance. Ensure to position your podcast room near a window, to utilize the benefits of natural light. Or use a combination of natural and artificial light sources. Lastly, adding personal touches to the podcast room design, such as artwork, plants, and other decorative elements, can reflect your brand and personality. |
Home Studio Setup Ideas
Choose the Right Space
When choosing a location, pay attention to older structures as they may have more ground-related problems. Variations in voltage on your ground or neutral leg can induce noise into your audio signals.
If building a custom recording space isn’t an option due to budget constraints, don’t worry – any room in your house can work! The key is making sure the space is suitable for recording. Steer clear of large empty rooms that could create echo and distort your sound.
Also, try to avoid spaces with many hard surfaces such as mirrors or windows since these surfaces reflect sound and could cause distortion too.
Instead, look for rooms that have lots of soft materials like carpets and fabric furniture. These types of materials are great at reducing echoes and reverberations which leads to better podcast sound quality. That’s why you’ll often find them used in professional recording studios!
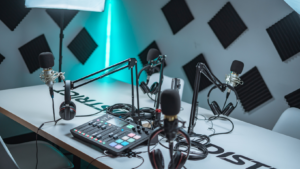
Furthermore, when constructing a technical audio facility, a high degree of focus should be applied to the power aspect. In instances where the design includes numerous analogue devices, it would be best to utilize Isolated Ground (IG) power alongside a mitigating transformer for three-phase power.
It may be necessary to change your recording schedule if it’s affected by external noise. For instance, if your neighbourhood is undergoing construction, it may be essential to avoid recording during those times. Rooms that are not facing the street and do not have windows or adjoining walls are even better. Finished basements can be a suitable option for this purpose. Additionally, it’s crucial to consider nearby appliances, as loud air systems like air conditioning units or air purifiers can negatively impact the quality of your recording.
It may surprise you, but many podcasters record their podcasts in their closets. The reason is that closets typically have sound-absorbing clothes, are often carpeted, and are located in less frequently used rooms such as bedrooms. Walk-in closets, in particular, are perfect for obtaining high-quality audio without any echoes.
Soundproofing Your Recording Studio
After selecting a location for your podcast, it is recommended to experiment with various sound treatment techniques to enhance the audio quality. Implementing strategies to improve the sound quality during recording will reduce the editing time required to fix any imperfections later.
Below are some recommended soundproofing tools that you can utilize to gradually enhance your environment’s sound performance.
Acoustic Wall PanelsTo prevent sound from bouncing all over the room and hitting your mic, acoustic panels come in two types. Wood-framed panels filled with a sound-absorbing core material or bare foam panels. By mounting these panels to walls and other flat surfaces, they absorb sound and reduce the echo in your space. Additionally, these panels can be easily purchased on Amazon. Bass TrapsThese traps are typically made from fibreglass or foam. They are designed to absorb sound waves that accumulate in the corners of a room, lowering the frequency and providing a smoother audio quality. By placing them in the high corners of the room, you can effectively absorb the frequencies that tend to collect in those areas. DiffusersWhile some argue that diffusers are not essential for a home studio setup, others believe they disperse reflected sound, maintaining its natural tone. Absorbing all sound frequencies can create an unnatural and dull atmosphere, so diffusers can be used in conjunction with or instead of sound-absorbing treatments to add life to a room. DIY AlternativeUtilizing blankets as a do-it-yourself substitution is a wise choice. You can suspend them on walls and cover solid surfaces, creating a cozy atmosphere. Additionally, scatter pillows throughout the space, placing them on bare desks or uncarpeted floor areas. 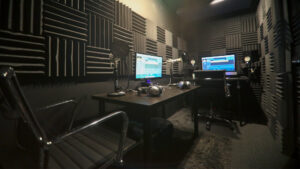 ctto |
If you intend to have a co-host or guests physically present with you, it will alter your approach. It is important to recreate your intended setup and procedures during your trial runs. It is essential to note that accommodating two or three voices is a vastly different experience compared to just one.
Grab Your Recording Equipment
If you want a complete podcast studio setup, you must have some podcast equipment. You should get a few essential pieces of gear to save time and avoid editing hassles. Here are six important pieces of podcasting gear you should have to create the perfect podcast setup.
- Computer – You need a dependable computer that boasts fast processing speed and substantial storage capacity, as the audio, and potentially video, files you’re planning to record will occupy a sizeable amount of space.
- XLR or USB Microphone – USB microphones are extremely convenient to use as they can be directly linked to one’s computer. On the other hand, you need additional equipment, such as a mixer, to connect an XLR microphone to your computer.
- Dynamic or Condenser Mic – Dynamic Mics are a popular choice for home studios as they are generally more affordable and are less prone to picking up ambient noise. On the other hand, Condenser Mics, which are most sensitive to ambient noise, may not be the best fit unless your home studio has robust soundproofing.
- Headphone – Headphones with a closed back offer the best isolation, though the sound quality may be slightly diminished. These are the ideal choice for podcasters due to their minimal sound leakage. On the other hand, open-back headphones provide superior sound quality but with less isolation.
- Audio Mixer & Interface – Be aware of a feature called mix-minus, which allows you to divide your audio signals into two distinct channels – one for yourself and another for your guest. This feature gives you total control over your separate tracks.Audio Interface is the hardware that links your computer with your equipment. If you opt for an XLR microphone, this is necessary to convert the analog input to digital.
- Popfilter – The main role of a pop filter is to remove explosive sounds from your audio records. It avoids distortion and guarantees a neater, more refined-sounding recording.
- Podcasting Table & Desk Chair – Your choice of podcast table has considerable influence on the atmosphere it creates for your show and how people respond to and interact with the content.
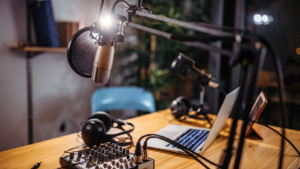
Set Up Your Equipment
Finally, after selecting the appropriate tools, the next step is to arrange and prepare the necessary equipment, which includes your computer, microphones, audio mixer, and other devices.
Rearrange speakersYou can place speakers along either the long or short wall in a typical rectangular room. In other words, the speakers can be situated on either side of the room. In the case of speakers positioned along a lengthy wall, the initial reflections from the side walls will inevitably experience a delay compared to the sound emanating directly from the speakers. Consequently, the sound will be more distinct. Nevertheless, since the distance between the speakers and the listener is small, long low-frequency waves will not have sufficient time to develop, resulting in a slight bass deficiency. On the other hand, if speakers are placed along a short wall, and the listener sits farther away, the bass will increase, but the clarity of the sound will diminish. It is advisable to position your speakers at the center of your wall. This allows for simultaneous sound reflection from the side walls to the listener. However, if your speakers have a bass reflex, placing them too close to the wall is not recommended. This is because the signal will undergo both transmission and reflection when reaching the back wall. Thus, causing low frequencies to be heard by your neighbours instead of you. To avoid this, it is best to move your speakers at least half a meter away from the wall. Place speakers on standsFor those who own large floor-standing speakers and subwoofers, there are special anti-vibration mounts available. On the other hand, if you have shelf acoustics, you will require vibration-isolating stands and stands that can be adjusted to the listener’s ear level. Move FurnitureWhen a sofa is present, positioning it directly in front of the speakers is ideal, as it can effectively absorb sound waves. In addition, a large sofa can serve as a highly effective sound barrier. As for chairs, they should be placed in the room’s corners to function as bass traps. Similarly, a wardrobe filled with clothes can serve this purpose, as the low frequencies can easily penetrate the walls and become trapped within the fabric. LightingAddress the echo issue in podcast rooms by covering huge windows with thick curtains. Greater density and weight in fabric results in improved absorption of superfluous sound reflections. Moreover, adding some ambient light can enhance the room’s overall atmosphere. This can be done with floor lamps, table lamps, or string lights. However, it is important to avoid harsh lighting, such as fluorescents, as they can be unflattering and make it difficult for people to see each other. Incorporating A RugWhen tiles are on the floor, achieving good sound can be difficult due to reflections. To remedy this, a rug can be placed on the floor, preferably with a coarse pile. Alternatively, the stretch fabric can be installed on the ceiling to absorb reflections from above, although this may be more costly. However, adding carpet to the walls should be avoided unless the room has excessively high frequencies and brightness. Adding carpet to the walls may exacerbate the issue if the room lacks low frequencies and has a booming sound. |
There is no one-size-fits-all approach when it comes to setting up a podcast. The ideal setup will depend on your personal preferences, the dimensions of your room, and the equipment you have selected. Therefore, there are no definitive rules or guidelines.
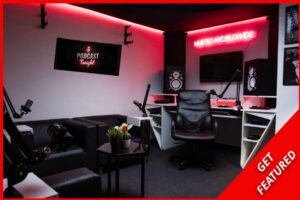
Professional Podcast Studio Setup To Enhance Audio Recordings
Hiring a podcasting consultant is a wise decision, as every space has unique characteristics. Alternatively, renting a podcast studio is suitable for Level 3 podcasters. Nevertheless, since podcasting is an ongoing process, adjustments can always be made to improve the recording space. It is recommended to start with a good setup and gradually enhance it over time.
The key to successful podcasting is to enjoy the process and have confidence in yourself, regardless of your preferred studio. Attracting a devoted audience as a novice podcaster may take some time, but it’s essential not to lose faith and persevere.

COMMENTS
Heya i’m for the first time here. I came across this board and I
find It truly useful & it helped me out a lot. I hope to give something back and help others
like you aided me.