In the age of digital media, podcasts have seen a meteoric rise in popularity. For those who wish to join this growing trend and share their thoughts
In the age of digital media, podcasts have seen a meteoric rise in popularity. For those who wish to join this growing trend and share their thoughts with the world, we’ve got you covered! Our article will guide you on how to record a podcast effortlessly using your Windows 11. You need not worry about having fancy equipment or sophisticated software; all that’s required is right there in your device!
So whether you’re looking to start your own series or simply want to share an interesting conversation with others, read on as we delve into numerous ways of capturing audio content on Windows 11 for your podcasting journey.
Windows 11 Voice Recorder
The Voice Recorder in Windows 11 is an integral feature that allows you to record audio using your computer’s microphone. This easy-to-use app can capture a wide range of sounds, from lectures and voice calls to meetings and interviews. After the recording process, it enables you to store the audio file in common formats such as MP3, FLAC, WMA or WAV.

Additionally, this tool lets you edit your recordings by trimming and splitting them before sharing directly from the app itself. The upgraded version also offers new features like changing microphones right from the home screen and adjusting playback speed.
How to Record Audio with Voice Recorder
Set Up The Microphone
To configure your microphone on Windows 11, you need to access the Sound settings under System in the Settings menu.
- Click on Start and choose Settings.
- Select System and proceed to Sound. Under the Input section, specify which microphone is used for speaking or recording from the available options in a drop-down list. If necessary, pair a device by selecting Pair option.
- Ensure its functioning properly by testing it and observing the sound level bar; adjust volume or boost controls if required.
Open The App
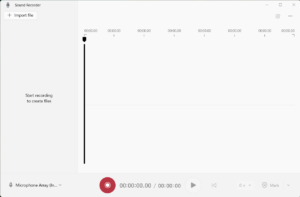
- Next, you need to launch the Sound Recorder application. This app allows you to capture audio on your Windows 11 PC.
- Just search for “voice recorder” or “sound recorder”. The app should appear if you enter its name in the search field. If it doesn’t come up for some reason, grab it from the Microsoft Store at no cost.
Record Your Podcast
- Begin recording by clicking on the large red button or using Control + R. This will transform into a Pause button. The length and file size of your recording can be viewed at the base of the application window.
- To temporarily halt recording, hit the Pause button; click it once more to continue.
- To cease recording entirely, press the Stop button, symbolized by a big black square.
- Use the mark icon or Ctrl+M to highlight crucial moments in your recording.
- Your completed recording will automatically appear on screen’s left side where you can right-click to either rename or share it.
- If you wish to modify either audio quality or record format, go to Settings under ellipses (…) located at top-right corner of your screen
Edit Your Recording
- Open the Sound Recorder app and choose your desired recording from the upper-left menu.
- To cut unnecessary parts of your podcast, click on the trim symbol and adjust the start and end points by moving the handles.
- If you want to rename your podcast, tap on the pencil icon and type in a new title.
- Save your edited recording by clicking on the share icon then select where you want it saved – either on your computer or an online storage service like OneDrive.
- You have the option to share your podcast via email or social media platforms directly from Sound Recorder; just hit that same share button again and pick which application you prefer to use for sharing.
Effortlessly Record A Podcast on Windows 11
Recording audio on Windows 11 computers is straightforward and doesn’t cost anything. By using a sound recorder for Windows 11, you can easily create a podcast or any other type of audio content right from your computer without any difficulty.


COMMENTS