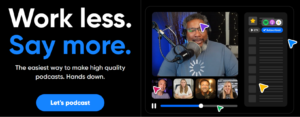
Podcasting has taken the world by storm and with it comes the need for high-quality sound. When you’re stepping into this realm, one of your main challenges is figuring out how to record crisp clear audio that appeals to listeners. This is where Zencastr steps in, providing a hassle-free solution for podcast recording. It’s touted as ‘The easiest way to record VoIP podcast interviews in studio quality.’
In this article, we will delve into how you can use Zencastr for your podcasting needs. Whether you are planning on doing an audio or video series, Zencastr could just be what makes your podcasts stand out from the crowd.
What Is Zencastr?
Zencastr is a software made for podcasters. It helps you record high-quality audio right from your home. To use it, you get a unique URL which you can share with anyone who will be speaking on your podcast. The cool thing about Zencastr is that it records each person’s voice separately in good quality, making it easy to edit later.
If editing sounds tough, don’t worry! Zencastr has special tools that automatically join the voices together with less effort from you. Plus, it has other useful features like adjusting volume and reducing background noise.
To understand the simplicity of using Zencastr, here are the steps to create your first podcast recording:
1. Create A Room
- Register for a no-cost Zencastr account with your personal details.
- Go to the dashboard and click Create Room.
- Assign a name to your room.
- Choose the language for recording your episode.
- Acknowledge that the show will be linked with Playground or opt for another show.
- Pick a mode for recording.
- Click on Create which takes you directly to your Recording Page.
2. Record An Episode
- Go to your profile’s dashboard and click on the ‘Create New Recording’ button at the top.
- This will take you to a new page where you can create a recording, so choose “Create New Episode” and give your show a name.
- If a notification asking for microphone access appears on your computer screen, make sure to agree.
3. Invite Guest/s
- From the Recording Page, select Invite.
- Enter the name and email of each individual (guest) you want to share the recording with.
- Click on Send Invites. Each guest will receive an email containing a link to the recording page and guidance. Alternatively,
- You can duplicate the invitation link and send it via your own email to your guests.
When the people you invite click on the link you provide, they simply need to enter their name. There’s no need for them to register or do anything else.
4. Check The Settings
Once everyone is connected:
- Ensure that all participants can hear and see each other.
- Confirm that you and your guests have selected the desired headphones, microphones, and cameras.
To adjust any audio or video preferences, on the Recording Page:
- You should click Call Settings.
- Each guest should also click Call Settings.
5. Start & End Recording
- Start the recording process by clicking on “Start Recording.” A 3-second countdown will show before the recording begins.
- If you need to pause the recording, for example, to instruct your guests or if someone needs a break, simply click on the “Pause” button. You can restart the recording by clicking “Start Recording” again.
- When you’re ready to stop broadcasting and end your session, press the “Stop Recording” button. This will return you back to a standard VOIP call. As a host, remember that only you have control over starting and stopping recordings.
- Zencastr will automatically send all local audio tracks directly for saving on your computer. If required, hosts can also download their guest’s audio files.
6. Download The Files
- On the Recording Page, each user track has an MP3 button and a MOV button. If you have a paid plan, you’ll also see a WAV button.
- Press on any of these buttons to see all files of that type in a new window.
- Choose the file you wish to download by clicking on it. This will save it to your computer.
- Follow this process for downloading all individual user’s files.
Alternatively,
You can also download your files from the Produce page.
Why Zencastr?
Numerous podcasters turn to platforms such as Zencastr for their audio recordings due to a variety of compelling reasons. Here are some key benefits that can significantly enhance your podcasting experience:
- Separate Audio Tracks: With Zencastr, each speaker’s audio is recorded separately, allowing for better precision during editing and ensuring that poor quality from one speaker doesn’t affect the entire podcast.
- User-Friendly Features: The platform offers an array of unique features like live chat with other speakers and cloud drive integration, all designed to simplify the user experience even for beginners.
- Free Plan Option: Zencastr provides a free plan which gives access to several useful features suitable for hobbyists or intermediate podcasters looking to improve their show’s audio quality.
- Automatic Editing Tools: If you’re not confident in your editing skills, Zencastr has automated post-production tools that enable you to apply various filters and fixes resulting in a professionally polished final product.
- Built-In VOIP Calls: You don’t need separate software for VOIP calls as they can be made directly through Zencastr. This feature also allows you to start recording at any point during the call with just a button click.
- High-Quality Audio Recording: All recordings on Zencastr are done in lossless 16 Bit 44.1k WAV format ensuring top-notch sound quality similar to professional studio standards even after post-production edits.
Downside Of Zencastr
To ensure Zencastr functions optimally, you should use high-quality over-ear headphones, avoiding phone earphones and Bluetooth devices that might disrupt the audio. Remember, Zencastr is only compatible with desktops or laptops; smartphones or tablets won’t work. Other participants will need to access the platform through a URL on their PC.
Google Chrome is recommended for using Zencastr as there have been some problems reported with Safari and Firefox. Also, since all files in Zencastr are locally recorded, make sure your computer has ample storage space available to save these files once recording ends.
How to record a podcast via skype
Master Your Podcast with Zencastr
Zencastr emerges as an incredibly useful tool for podcasters looking to produce high-quality content. Its web-based nature allows for easy accessibility and smooth collaboration with guests from any location. The platform’s intuitive design ensures the recording process is seamless, saving you from common pitfalls experienced while using other services. However, its effectiveness ultimately depends on your specific needs and objectives. With a computer, internet connection and Google Chrome browser being the only requirements, it’s definitely worth considering Zencastr when planning your next podcast episode.
Leave a Reply