If you're looking to share your ideas with a broader audience, podcasting can be an excellent way. However, ensuring that your podcast has high-qualit
If you’re looking to share your ideas with a broader audience, podcasting can be an excellent way. However, ensuring that your podcast has high-quality audio can be a challenging task. Whether you’re new to podcasting or seeking to improve the sound of your existing recordings, we have some tips and techniques to help you create a podcast with clear, professional, and engaging audio.
In this guide, we’ll look at some important strategies and best practices for recording a podcast that will sound great and captivate your listeners.
Key Techniques For Optimizing Sound Quality During Podcast Production
Here are some podcast recording tips that can help you improve your audio quality:
Pick a noise-free location
If you want the best sound quality for your podcast, it’s super important to find a quiet place to record. You want to avoid any background noise like cars, home appliances or people chatting. Here are some tips on picking the right spot for recording.
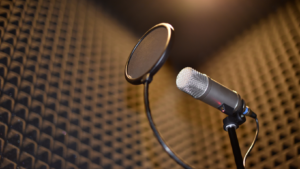
- You’ll want to see how noisy it is and if anything could mess up your sound.
Rooms with soft stuff like carpets, curtains or foam panels help lessen echoes. - Finding a room with a door can also be helpful since it gives you some control over the noise level. If possible, avoid rooms with windows, but if not – covering them up with thick curtains or blankets might do the trick in reducing outside noise.
- Try to stay away from places where lots of people pass by such as hallways or entrances because they could interrupt your recording. Instead, pick a quiet room that isn’t used much by others.
Eliminate background noise
To make sure your recording is clear, try to get rid of any background noise. Turn off anything that might create sound like fans, air conditioners or dehumidifiers. Also, remember to switch off notifications on your gadgets so they don’t interrupt while you’re recording.

In addition, please remember to close all doors and windows. This will help block out any unwanted noise that might disrupt your recording. It could also be helpful to do your recording during quieter times of the day when there’s less background noise.
If you still find some background noise in your recordings, don’t worry! You can use special tools found in most editing software programs that are designed to reduce or remove this type of disturbance.
Use a microphone with excellent sound quality
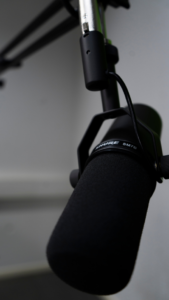 When choosing a microphone for podcasting, there are several factors to consider.
First up is the type of microphone. Dynamic microphones are tough and can take loud noises in their stride, whereas condenser mics pick up more detail and have a bit more sensitivity. You should also consider which direction the mic picks up sound from – if you’re in a noisy environment, then a directional mic might help cut out some of that background noise.
How your microphone connects to your recording device is another thing to keep in mind. USB microphones are super easy to use (just plug it in and start talking!) but XLR mics usually deliver better audio quality.
Another important feature is frequency response – this refers to how well the mic captures different pitches or frequencies of sound. For most people, an even or ‘flat’ frequency response will do just fine.
Last but not least, don’t forget about price! While we all love top-of-the-range gear, there’s plenty of great-value options out there that still offer fantastic sound quality.
Popular options among podcasters include dynamic microphones, such as the Shure SM7B, or condenser microphones, like the Audio-Technica AT2020.
Use a Pop Filter
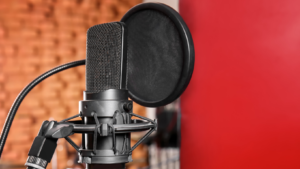
A pop filter is a handy gadget used in sound recording. It helps to cut out or get rid of popping or booming sounds caused by letters like ‘p’, ‘b’, and ‘t’. Think of it as a screen that’s positioned in front of the microphone to stop or soak up sudden bursts of air when we say these sounds. This way, the pop filter stops any distortion or unwanted noise from messing up the recording. The end result? Clearer, better quality audio.
Get the right mic’s distance and angle
Make sure you’re standing right in front of the microphone and that it’s not too far or too close to your mouth. Usually, a distance of about 6 to 8 inches is just right but this can change depending on what kind of mic you’re using. Try pointing the mic directly at your mouth for the best sound quality. Always do a quick sound check before recording and move the mic around if needed until it sounds perfect.
Use headphones
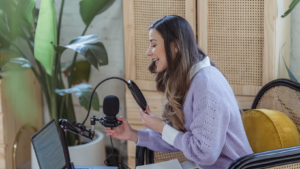
By wearing headphones during recording, you can monitor your audio in real-time and make any necessary adjustments. This will also help you avoid unwanted sound feedback during recording.
Closed-back headphones are recommended to provide better sound isolation and prevent sound from leaking into the microphone.
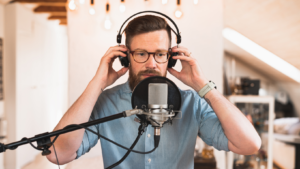
Plug your headphones into your recording device and make sure they fit snugly over your ears. Keep an eye on the sound quality while you’re recording, making sure it’s clear and well-balanced. Don’t forget to tweak the volume so it’s at a level that feels comfortable for you.
Create a detailed outline and allocate time to ensure an outstanding presentation

While it’s great to have a top-notch microphone for your podcast, remember that confidence and captivating content are the real keys to success. Don’t worry if you’re not naturally gifted at live performances; the fantastic thing about podcasting is you can practice until you perfect it.
One of the perks of using a script is that it simplifies editing. With all your thoughts sorted out on paper, modifications become easy peasy, and you could also use this script as a foundation for other platforms like transcripts or blog posts.
Now, granted you can’t pen down everything ahead of time, such as interactions with co-hosts. But drafting a robust outline with ready-to-go intros, questions, and closing remarks can help maintain an effortless flow throughout your podcast.
To give some structure to your episode and tie things up neatly at the end – let listeners know upfront what topics will be covered during the show and summarize key points at the close. This method also works well for presentations or pitch meetings.
Practice your plosives & sibilance
Plosives are the pops you hear when we say certain sounds like “p,” “b,” and “t.” It’s just a quick burst of air that can make an annoying pop sound. On the other hand, sibilance is about those hissy noises that happen when we say sounds like “s,” “z,” and “sh.” These sounds can be distracting to listeners and lower your podcast’s overall sound quality.

A reminder for podcasters. Pay attention to how they pronounce certain sounds when recording their podcast to ensure optimal audio quality. By practicing proper microphone techniques and using tools such as pop filters and de-esser plugins, podcasters can minimize unwanted noises and deliver a high-quality audio experience for their listeners.
Record in a lossless format
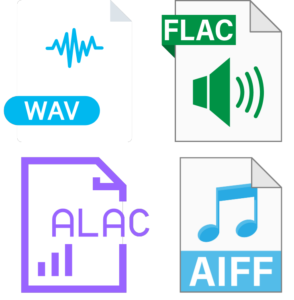
Recording in a lossless format means that the audio you capture is stored without any of your data being compressed or lost. This ensures that your sound quality is top-notch. Some examples of these high-quality audio formats are WAV and FLAC, which preserve all of the original audio without compressing or losing any data.
To use this type of recording, go to your recording software’s settings or preferences section and select the lossless format option. However, it’s important to check if your recording device can handle these formats because not all devices have this feature.
Also, for even better sound quality, try setting a higher bit-depth and sample rate when you record – like 24-bit and 48kHz. These adjustments can make a big difference in enhancing your overall audio quality.
Go for multitrack recording
Multitrack recording is a method where each speaker or sound element in an audio piece, like a podcast, is recorded separately on its own track. What’s great about this technique is that it gives you more control over the quality of your audio. You can tweak and adjust each individual track to get the perfect balance of sound.
In podcasting, using multitrack recording can significantly enhance your audio by allowing you to control sound levels better, fine-tune equalization (EQ), and apply other effects as needed. Plus, it makes editing easier too! If there are any unwanted sounds or interruptions during recording – no worries! You can simply remove them from their respective tracks without affecting the others.
And here’s another advantage: multitrack recording comes in really handy when hosting remote guests on your show. Each guest can record their part locally which means we avoid potential issues with internet connectivity or poor sound quality due to distance.
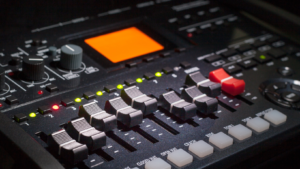
Now let’s be honest- while all these benefits make multitrack recording appealing, it does demand some extra time and technical know-how compared to single-track recordings. And yes, you might need more equipment too. But if achieving top-notch audio for your podcast tops your priority list then considering multitrack recording could well be worth all that effort!
Edit & mix your audio
Editing your podcast audio is a key part of making sure it sounds great. It’s normal to have some hiccups during recording, like unexpected pauses or background noise. When you’re editing, remember to keep the conversation flowing naturally and avoid chopping out too much – you don’t want your podcast sounding disjointed. Also, be careful not to cut anything that might help listeners follow along with what’s being discussed.
To refine your podcast’s audio quality, utilize a digital audio workstation (DAW) such as Adobe Audition, Audacity, or Logic Pro X to edit the audio. Organize your audio files into folders and label them correctly to make them easier to find and work with.

Use EQ and compressionUse EQ and compression to balance the levels and frequencies of your audio. EQ can balance the frequency ranges in your audio and make it clearer by boosting high frequencies or reducing low frequencies. While, compression can make the volume levels of your audio more consistent by reducing loud sounds and increasing quiet sounds. And this can be particularly helpful for spoken word content like podcasts. However, it’s important to use these tools judiciously and make subtle adjustments to avoid an unnatural sound. Moreover, adding effects such as reverb or delay can add depth and character to your audio, but use them sparingly. Normalize your audioNormalizing your audio means adjusting the volume levels of your audio file to ensure consistency throughout the recording. It helps prevent variations in volume levels caused by recording conditions and ensures that the loudest part of your audio file is at a consistent level. Normalization does not change the dynamic range of the audio and can prevent clipping or distortion caused by the volume being too high. This technique should be used as a post-production tool to ensure volume consistency and is not a substitute for proper gain staging during the recording process. Master your audioBefore upgrading your audio setup, try using one of the many online audio creation platforms, such as Podcastle. These platforms can help you avoid the complexities of audio editing software and manual processes. They provide automatic voice enhancement tools, including compression and noise removal, which can help you achieve the desired end result with minimal effort. Developing a post-production ritual using these platforms can help you improve the quality of your audio content without the need for expensive equipment or technical expertise. |
Achieving Optimal Sound Quality in Your Podcast Recordings
To create a truly exceptional podcast that captivates your audience, you must pay close attention to detail and prioritize sound quality. The advice presented in this article will allow you to produce a professional-sounding and captivating podcast. Be sure to take the necessary steps to prepare before recording, and don’t hesitate to try out new techniques and expand your knowledge. With perseverance and dedication, you can craft a podcast that sets you apart and resonates with your listeners.

COMMENTS